OpenStack CLI
This guide covers the same first VM workflow as the Skyline guide, but uses the OpenStack CLI from start to finish.
Prerequisites
Before you begin, make sure you have completed the onboarding flow and your account is fully activated in Voyager.
Set Up the OpenStack CLI
-
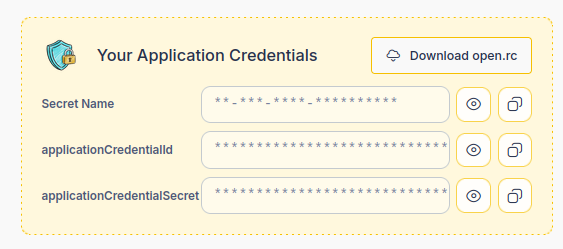
Download the OpenStack credentials file from Voyager's Quick Start section. Depending on your setup, it may be named
open.rcoropenrc.sh. -
Install the OpenStack CLI:
sudo apt update
sudo apt install -y python3-openstackclient
Expected result
...
Setting up python3-openstackclient ...
Load your application credentials:
Look for either open.rc or openrc.sh and source the file you have from the directory where you saved it.
source open.rc
# or
source openrc.sh
Expected result
# No output is expected if the file loads successfully.
Step 1: Verify CLI Access
Check that your application credentials are working before creating resources.
openstack token issue
Expected result
+------------+----------------------------------+
| Field      | Value                            |
+------------+----------------------------------+
| expires    | 2026-04-29T12:34:56+0000         |
| project_id | <your-project-id>                |
| user_id    | <application-credential-user-id> |
+------------+----------------------------------+
Step 2: Create a VM
Create a VM with the same defaults used in the Skyline guide.
openstack server create \
  --flavor c1.small \
  --image ubuntu-24.04 \
  --boot-from-volume 10 \
  --network local-net \
  --security-group default \
  --key-name bootstrap \
  --wait \
  test-vm
Expected result
+-----------------------------+----------------+
| Field                       | Value          |
+-----------------------------+----------------+
| OS-EXT-STS:vm_state         | active         |
| addresses                   | local-net=...  |
| flavor                      | c1.small       |
| image                       | ubuntu-24.04   |
| key_name                    | bootstrap      |
| name                        | test-vm        |
| status                      | ACTIVE         |
+-----------------------------+----------------+
Step 3: Allow SSH and ICMP Access
Open ICMP and port 22 on the default security group so you can test reachability and connect later.
Allow ICMP:
openstack security group rule create \
  --ingress \
  --protocol icmp \
  --remote-ip 0.0.0.0/0 \
  default
Expected result
+-------------------+--------------------------------------+
| Field             | Value                                |
+-------------------+--------------------------------------+
| direction         | ingress                              |
| protocol          | icmp                                 |
| remote_ip_prefix  | 0.0.0.0/0                            |
| security_group_id | <default-security-group-id>          |
+-------------------+--------------------------------------+
Allow SSH:
openstack security group rule create \
  --ingress \
  --protocol tcp \
  --dst-port 22 \
  --remote-ip 0.0.0.0/0 \
  default
Expected result
+-------------------+--------------------------------------+
| Field             | Value                                |
+-------------------+--------------------------------------+
| direction         | ingress                              |
| protocol          | tcp                                  |
| remote_ip_prefix  | 0.0.0.0/0                            |
| security_group_id | <default-security-group-id>          |
+-------------------+--------------------------------------+
Step 4: Assign a Floating IP
Allocate a floating IP from the ext_net_gts network:
openstack floating ip create ext_net_gts
Expected result
+---------------------+---------------+
| Field               | Value         |
+---------------------+---------------+
| floating_ip_address | 89.34.105.208 |
| status              | DOWN          |
+---------------------+---------------+
Find the port attached to your VM:
openstack port list --server test-vm
Expected result
+--------------------------------------+-------------------+---------------------------------------------------+--------+
| ID                                   | MAC Address       | Fixed IP Addresses                                | Status |
+--------------------------------------+-------------------+---------------------------------------------------+--------+
| 29f7073a-e93c-425e-ae0a-5b364c40ab61 | fa:16:3e:f1:05:6f | ip_address='10.0.19.157', subnet_id='<subnet-id>' | ACTIVE |
+--------------------------------------+-------------------+---------------------------------------------------+--------+
Attach the floating IP to your VM port:
openstack floating ip set --port <port-id> <floating-ip>
Expected result
# No output is expected if the association succeeds.
Verify the floating IP is attached:
openstack floating ip list
Expected result
+---------------------+------------------+--------------------------------------+---------+
| Floating IP Address | Fixed IP Address | Port                                 | Status  |
+---------------------+------------------+--------------------------------------+---------+
| 89.34.105.208       | 10.0.19.157      | 29f7073a-e93c-425e-ae0a-5b364c40ab61 | ACTIVE  |
+---------------------+------------------+--------------------------------------+---------+
FIP attachment not possible using WebUI (Horizon/Skyline)
During onboarding, DevOpsCentral prepares local-net so it is already connected to the external ext_net_gts network.
That router is managed by the platform and is not exposed in your project, so you do not need to create or manage it yourself.
Because of this, the floating IP association works, but it can only be completed with the OpenStack CLI by attaching the floating IP directly to your VM port.
Step 5: Testing (Ping & SSH)
Download the bootstrap private key from Voyager's Quick Start section. The following commands assume bootstrap.pem is in your current working directory.
chmod 600 bootstrap.pem
Test reachability first:
ping -c 3 89.34.105.208
Expected result
PING 89.34.105.208 (89.34.105.208) 56(84) bytes of data.
64 bytes from 89.34.105.208: icmp_seq=1 ttl=63 time=5.72 ms
64 bytes from 89.34.105.208: icmp_seq=2 ttl=63 time=6.18 ms
64 bytes from 89.34.105.208: icmp_seq=3 ttl=63 time=6.70 ms
Connect to your VM:
ssh -i bootstrap.pem ubuntu@89.34.105.208
Expected result
ubuntu@test-vm:~$
Tip
The default username for ubuntu-24.04 images is ubuntu.
Note
If the ping test or SSH connection times out, verify that Step 3 added the ICMP and TCP port 22 rules to the default security group and that Step 4 successfully attached the floating IP to your VM port.