Skyline
This guide covers the first steps to get started with OpenStack in Skyline on DevOpsCentral after your account has been activated.
Prerequisites
Before you begin, make sure you have completed the onboarding flow and your account is fully activated in Voyager.
-
Launch Skyline from Voyager Quick Start section. -
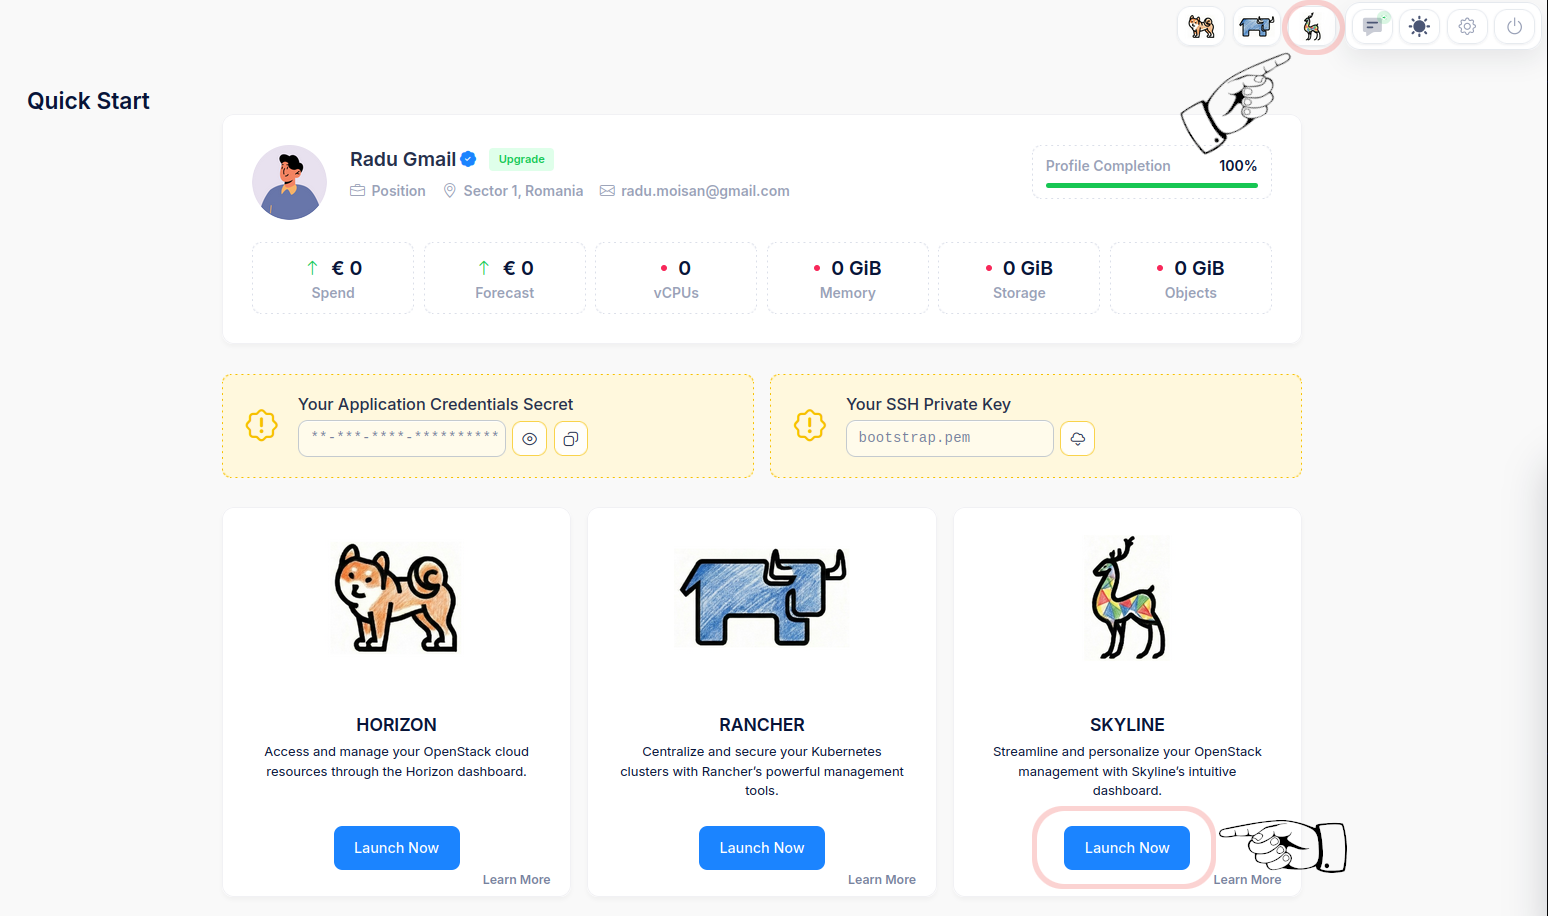
Step 1: Log into Skyline
-
Log in using SSO credentials from your DevOpsCentral account.Use OpenID Connect
On the login screen, select
OpenID Connectas the authentication method — do not use Keystone credentials.
This enables SSO powered by Keycloak, which is the required login method for DevOpsCentral accounts. -

Step 2: Create a VM
-
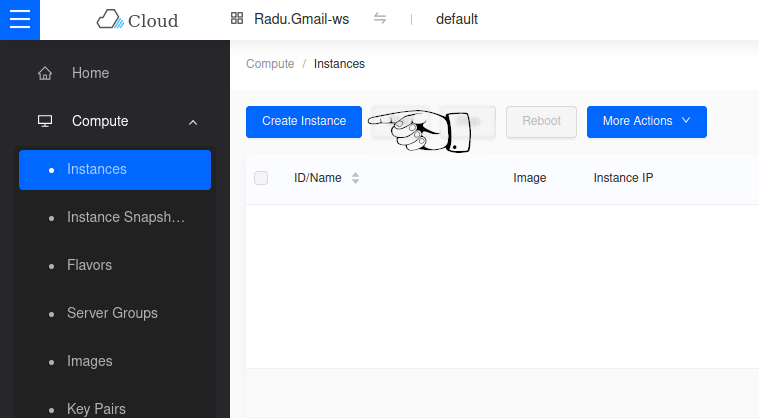
Navigate to Compute
⤷ Instances
⤷click Create Instance. -
Phase 1: Base Config
This phase defines the hardware profile and operating system for your instance.
-
1.1 Select Availability Zone
Choose the availability zone for your instance.
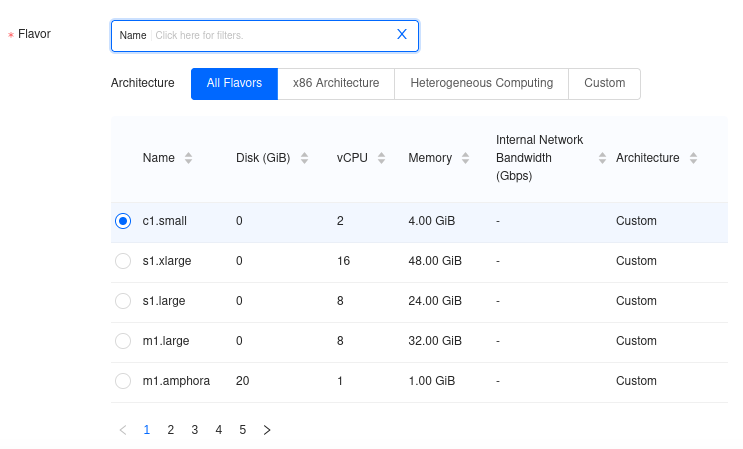
⤷ selectnova.1.2 Select Flavor
Choose the hardware profile that matches your workload.
⤷ selectc1.small(2 vCPU / 4 GiB RAM). -
-
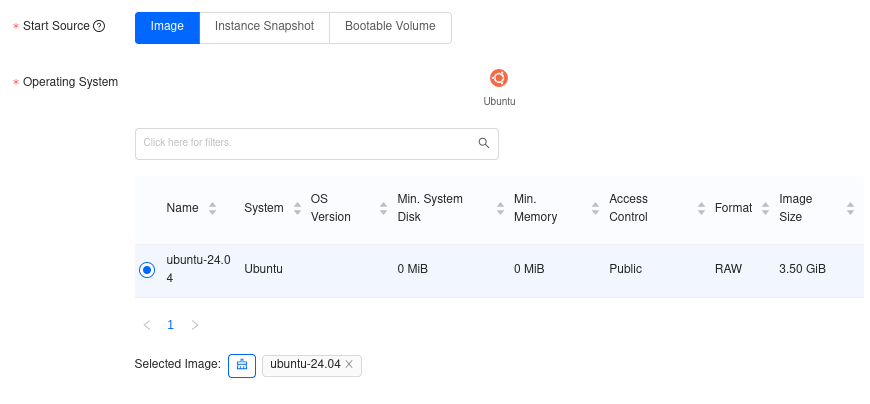
1.3 Set Start Source
Under Start Source
⤷ ensureImageis selected.
This builds the instance from a fresh OS template.1.4 Choose Operating System
⤷ Select
ubuntu-24.04. -
-
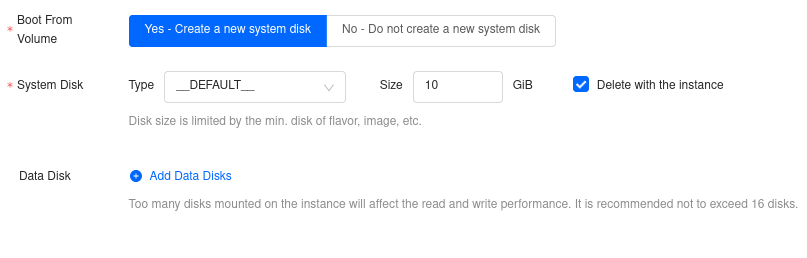
1.5 Configure Boot Volume
Under Boot From Volume
⤷ selectYes - Create a new system disk.1.6 Define System Disk Size
Set the Size to
10 GiB
⤷ and check theDelete with the instancebox.1.7 Add Data Disks (Optional)
Skip this step for a basic VM.
-
Click Next: Network Config to continue.
Phase 2: Network Config
IPv6 connectivity required for this path
This guide attaches the VM directly to ext_net_digi_ipv6, which gives the instance a public IPv6 address.
To reach that VM from your own machine, your local LAN and upstream network must have working IPv6 connectivity.
If your usual network does not provide IPv6, test from another network first, such as a mobile device or mobile hotspot, which often has IPv6 enabled by default.
This phase connects your instance to the network and applies firewall rules.
-
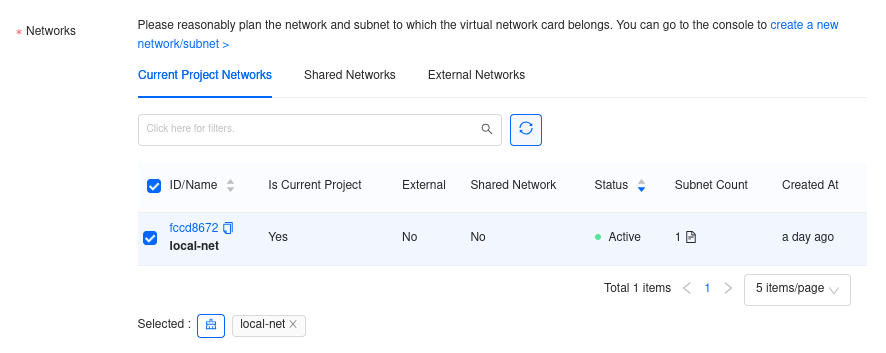
2.1 Select Networks
Under the Shared Networks tab
⤷ check the box forext_net_digi_ipv6. -
-
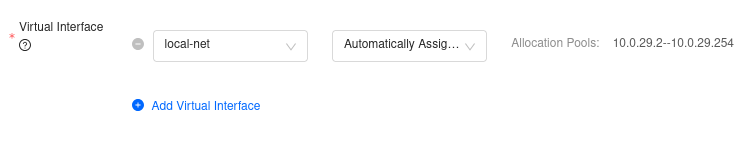
2.2 Configure Virtual Interface
Once the network is selected, the Virtual Interface section populates automatically:
⤷ Network:
ext_net_digi_ipv6
⤷ IP Address: automatically assigned public IPv6 address -
-
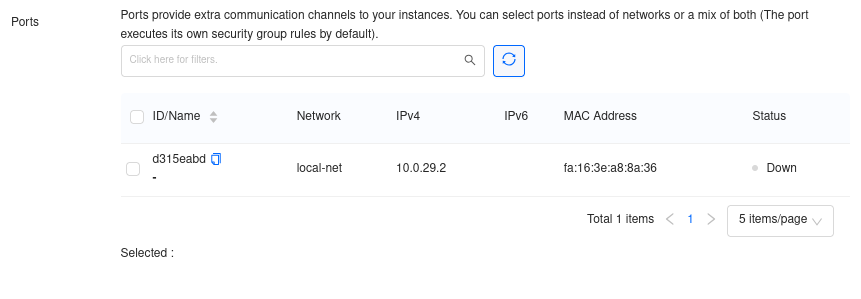
2.3 Manage Ports
Skip this section.
-
-
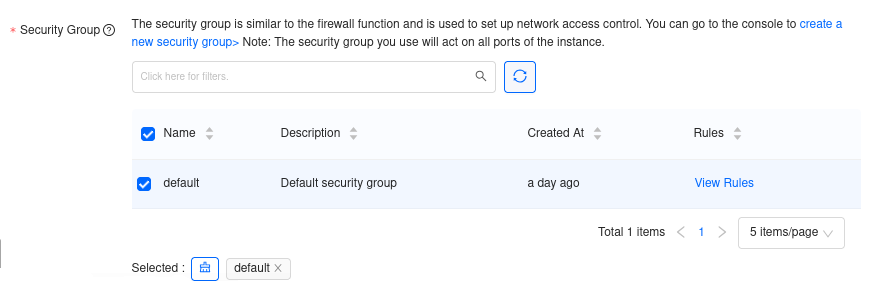
2.4 Apply Security Groups
Select the
defaultsecurity group. -
Click Next: System Config to continue.
Phase 3: System Config
This phase assigns an identity to your instance and configures SSH access.
-
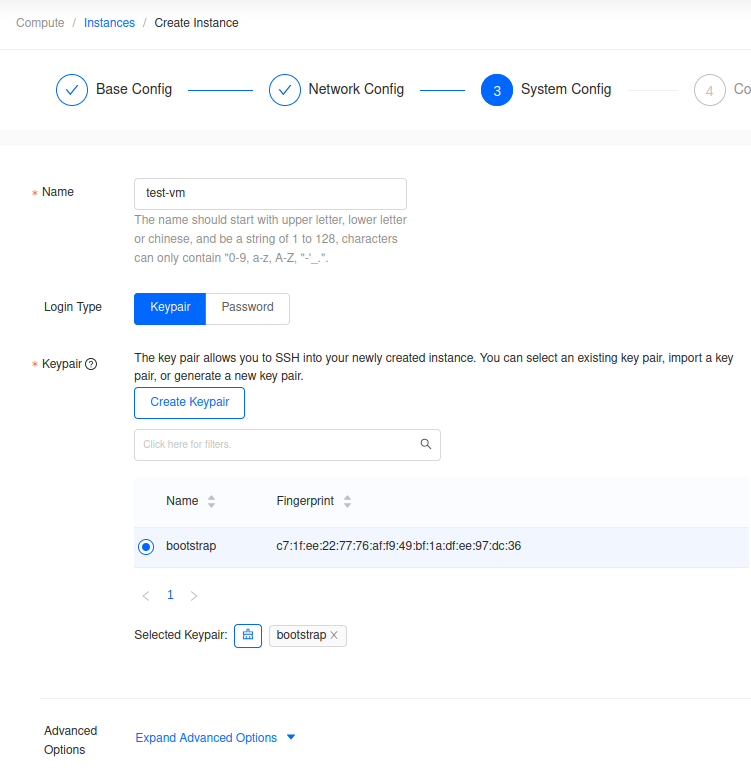
3.1 Assign Instance Name
In the Name field,
⤷ enter a name for your VM (e.g.test-vm)3.2 Choose Login Type
Select
Keypairas the login type.3.3 Select SSH Keypair
⤷ Select the
bootstrapkeypair.Info
The private key for the
bootstrapkeypair is available for download from the Quick Start section in Voyager.3.4 Advanced Options (Optional)
Skip for a basic setup.
-
Click Next: Confirm Config to continue.
Phase 4: Confirm Config
Review the configuration summary before provisioning.
| Area | Confirm |
|---|---|
| Base | nova, ubuntu-24.04, c1.small, 10 GiB system disk |
| Network | ext_net_digi_ipv6, auto-assigned public IPv6 address, default security group |
| System | test-vm, keypair bootstrap, Smart Scheduling |
Confirm Count is set to 1
⤷ then click OK.
-
The instance status will show Building and transition to Active once provisioning is complete. The assigned public IPv6 address will be visible in the instances list.
-

Step 3: Allow IPv6 Ping and SSH Access
Before you can connect, you need to allow both IPv6 ICMP and IPv6 SSH on the security group assigned to your instance.
-
Navigate to Network → Security Groups, find the
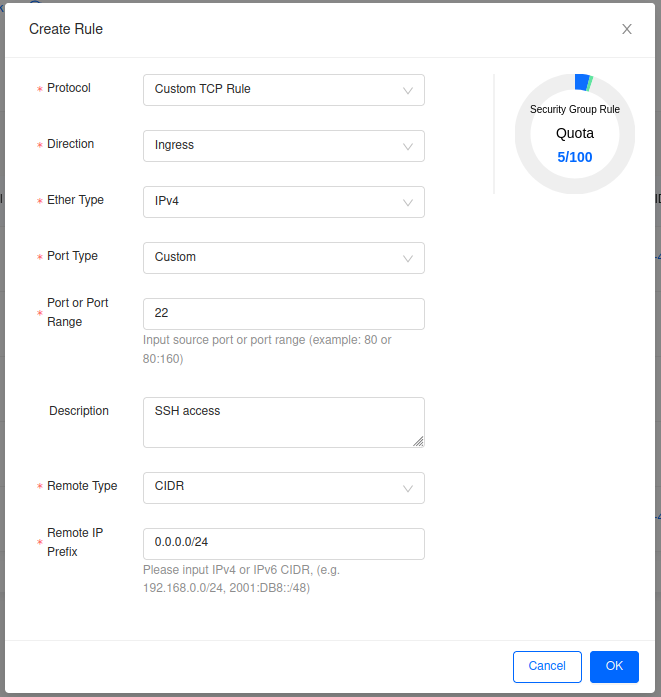
defaultgroup, and click Create Rule.Use Create Rule twice and create these ingress rules:
IPv6 ping rule
- Ether Type:
IPv6 - Rule:
Custom ICMP Rule - Direction:
Ingress - Remote:
CIDR - Remote IP Prefix:
::/0
IPv6 SSH rule
- Ether Type:
IPv6 - Rule:
Custom TCP Rule - Direction:
Ingress - Port:
22 - Remote:
CIDR - Remote IP Prefix:
::/0
Click OK to save each rule.
- Ether Type:
-
Step 4: SSH into Your VM
Your VM is attached directly to ext_net_digi_ipv6, so it receives a public IPv6 address during provisioning. After adding the IPv6 ICMP and SSH rules above, you can validate reachability and then connect as soon as the instance becomes Active.
Use the public IPv6 address shown in the Instances list or in the instance details.
IPv6 connectivity required
Your local machine and network must have working IPv6 connectivity to reach an instance on ext_net_digi_ipv6. If your normal LAN does not support IPv6, try from a mobile device or hotspot first.
Test reachability:
ping -6 2a02:2f0f:130:60::12e6
Expected result
PING 2a02:2f0f:130:60::12e6(2a02:2f0f:130:60::12e6) 56 data bytes
64 bytes from 2a02:2f0f:130:60::12e6: icmp_seq=1 ttl=63 time=3.24 ms
64 bytes from 2a02:2f0f:130:60::12e6: icmp_seq=2 ttl=63 time=2.01 ms
64 bytes from 2a02:2f0f:130:60::12e6: icmp_seq=3 ttl=63 time=1.66 ms
Note
If the ping test does not work, verify your IPv6 connectivity before continuing.
Prepare your private key:
Download the bootstrap private key from Voyager's Quick Start section. The following commands assume bootstrap.pem is in your current working directory.
chmod 600 bootstrap.pem
Connect:
ssh -6 -i bootstrap.pem ubuntu@2a02:2f0f:130:60::12e6
Expected result
ubuntu@test-vm:~$
Tip
The default username for ubuntu-24.04 images is ubuntu.